Gluten-Free Banana Oat Pancakes (Healthy & Easy)
-
Introduction
-
Ingredients (Metric + Imperial)
-
Equipment
-
Step-by-Step Instructions
-
Why the Texture Is Different
-
Healthy Benefits
-
Pro Tips
-
Troubleshooting
-
❄️ Storage & Reheating
-
Nutrition (per 100 g)
-
FAQ
-
You Might Also Like These Posts
Introduction
There’s something magical about waking up to the smell of freshly cooked pancakes — the golden edges, the soft, pillowy texture, the comfort of a weekend morning.
But what if you could enjoy that same nostalgic breakfast without any refined flour, and still keep it irresistibly delicious?
These gluten-free banana oat pancakes offer the perfect balance: naturally sweet from bananas, nutrient-dense from oats, and just as satisfying as traditional pancakes.
If you loved our Healthy Banana Pancakes, you’ll adore this wholesome twist.
Ingredients (Metric + Imperial)
3 ripe bananas (about 360 g / 12.7 oz)
2 cups (480 ml / 16 fl oz) milk
2 eggs
2½ cups (225 g / 8 oz) rolled oats (see our How to Make Oat Flour at Home guide!)
1 tsp vanilla extract
1 tsp ground cinnamon
pinch of salt
1 tsp baking powder
coconut oil or butter for frying
Equipment
Blender (if you make your own oat flour)
Bowl
Wisk
Pan

Looks goood! Yummy!
Step-by-Step Instructions
Prepare the oat flour:
Blend rolled oats until fine and flour-like. Check out our guide about How to Make Oat Flour at Home. This creates the base for your gluten-free pancake batter.Mash the bananas:
In a large bowl, mash the bananas until smooth.Add wet ingredients:
Whisk in the eggs, milk, vanilla, and salt until combined.Incorporate the dry mix:
Add the oat flour, baking powder, and cinnamon. Stir until smooth - you’re aiming for a thick but pourable batter.Rest the batter:
Let it sit for 15–30 minutes. Oats absorb moisture more slowly than wheat flour, so resting helps achieve the perfect texture.Cook:
Heat a pan over medium heat, lightly greased with coconut oil or butter. Pour small rounds of batter, and cook until bubbles form and the edges set. Flip and cook the other side until golden brown.
This is also where the Maillard Reaction works its magic - giving the pancakes their golden, caramelized flavor.
Why the Texture Is Different
Because oats contain no gluten, they don’t have the same elastic structure that traps air during cooking.
As a result, these pancakes are slightly denser yet wonderfully tender.
If you’d like them a bit fluffier, you can:
increase baking powder slightly, or
fold in a spoonful of whipped egg whites before cooking.

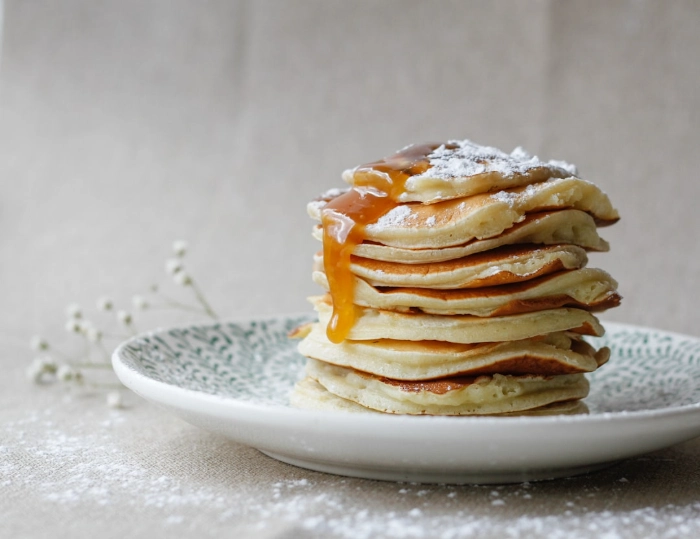
Not the prettiest, but the taste is king!
Healthy Benefits
Naturally sweetened: no refined sugar — ripe bananas do all the work.
High in fiber and complex carbs: oats promote slower digestion and sustained energy (see Harvard on oats).
Heart-friendly: according to NIH, β-glucan in oats may help lower cholesterol.
Protein-rich: two eggs plus oats make this a balanced, filling breakfast.
Pro Tips
Always choose certified gluten-free oats if you’re baking for someone with celiac disease.
Use coconut oil for a tropical hint or butter for a richer flavor and more intense browning.
Want extra depth? Add a tablespoon of Homemade Peanut Butter into the batter - it pairs beautifully with banana.

Mouthwatering, right?
Troubleshooting
Problem | Likely Cause | Fix |
|---|---|---|
Pancakes stick to the pan | The pan is not hot enough or has too little fat | Preheat longer, use more oil |
Too dense | Need more flour or oats are too coarse | Use finer oat flour, reduce rest time |
Batter too thin | Oats didn’t absorb enough liquid | Add 1–2 tbsp extra oat flour |
Pale, not golden | Heat too low | Raise the heat slightly for the Maillard reaction |
❄️ Storage & Reheating
One of the best things about these gluten-free banana oat pancakes is how easy they are to plan ahead.
You don’t have to cook the entire batch right away - the batter actually keeps well for a day or two if you’d rather enjoy them fresh each morning.
Here’s how to store them properly:
Batter (uncooked):
Pour it into an airtight container, cover tightly, and refrigerate for up to 2 days.
The texture might thicken slightly as the oats continue to absorb liquid, so if needed, you can just stir in a splash of milk before cooking.Cooked pancakes:
Keep them at room temperature for up to 1 day, or refrigerate for up to 3 days in an airtight box lined with parchment paper.Freezing:
Technically possible, but not ideal - the texture tends to soften once thawed. If you must, separate layers with parchment and reheat gently.Reheating:
Warm them in a dry skillet over medium heat or in the oven at 150 °C / 300 °F for about 5–8 minutes until just heated through.
Avoid microwaving if you want to keep the edges slightly crisp.
This way, you can enjoy your pancakes freshly made - whether it’s straight from the pan or from a chilled batter that’s ready when you are.

I could eat this every morning!
Nutrition (per 100 g)
Calories | Protein | Carbs | Fat | Fiber |
|---|---|---|---|---|
~165 kcal | 5.2 g | 27.8 g | 4.2 g | 3.1 g |
Balanced with some fresh fruit or Greek yogurt, these pancakes make a complete, energy-steady breakfast.
FAQ
Are gluten-free banana pancakes healthy?
Yes - they contain whole-grain oats, natural sweetness from bananas, and no refined sugar.
Can I make them dairy-free?
Absolutely! Swap regular milk for oat, almond, or soy milk.
Why aren’t my pancakes fluffy?
Because oat flour lacks gluten, they’ll be softer and denser. Add a bit more baking powder or whip the eggs separately for more lift.
Can I add blueberries or chocolate chips?
Definitely - just fold them in after mixing the batter.
You Might Also Like These Posts
Healthy Banana Pancakes – Naturally Sweetened Comfort for Every Morning
How to Make Oat Flour at Home: Easy, Healthy & Budget-Friendly
The Science Behind the Maillard Reaction: Unlocking the Secret of Browning and Flavor
Homemade Peanut Butter: Easy, Natural, and Surprisingly Delicious
-
Introduction
-
Ingredients (Metric + Imperial)
-
Equipment
-
Step-by-Step Instructions
-
Why the Texture Is Different
-
Healthy Benefits
-
Pro Tips
-
Troubleshooting
-
❄️ Storage & Reheating
-
Nutrition (per 100 g)
-
FAQ
-
You Might Also Like These Posts