Easy Sourdough Monkey Bread (From Scratch, With Cinnamon Sugar)
-
What Is Monkey Bread?
-
Why Use Active Sourdough Starter?
-
Ingredients (Metric + US)
- Dough
- Cinnamon Sugar Coating
- Butter for Dipping
-
Equipment
-
How to Make Sourdough Monkey Bread
- Prepare the Starter
- Mix and Knead
- Bulk Fermentation and Folds
- Shape the Dough Balls
- Coat and Layer
- Final Proof
-
Optional Cold Rest (If You Need Flexibility)
-
Baking Instructions
-
Bundt Pan vs Cake Pan (Tested)
- Why a Bundt Pan Is Ideal
- Using a Cake Pan (Works, but More Complex)
-
Pro Baking Tips (Important)
- Steam the Oven
- Foil Timing Matters
- Protect Your Oven!
-
Serving and Storage
-
You Might Also Like These Posts
Monkey bread - sometimes called pull-apart bread - is one of those desserts that naturally brings people together. You don’t slice it, you don’t portion it neatly. Everyone just pulls off a soft, sticky piece, usually followed by “okay, just one more.”
Originally popularized in the United States, monkey bread is all about buttery dough, caramelized sugar, and warm spices. It’s casual, fun, and perfect for sharing - especially with a larger family or a table full of guests.
This version is made with active sourdough starter, giving the bread a softer crumb and deeper flavor without a strong sour taste. It’s not meant to be healthy - it’s still a buttery, sugary dessert - but it is thoughtfully made, from scratch, with ingredients you understand.
What Is Monkey Bread?
Monkey bread is made from small pieces of dough that are:
dipped in melted butter
rolled in cinnamon sugar
layered loosely in a baking form
baked until sticky, golden, and pull-apart soft
As it bakes, the sugar caramelizes, and the dough pieces fuse together while still remaining easy to separate.
Many modern recipes rely on canned biscuit dough. This from-scratch sourdough monkey bread is a completely different experience - lighter, richer, and far more satisfying.

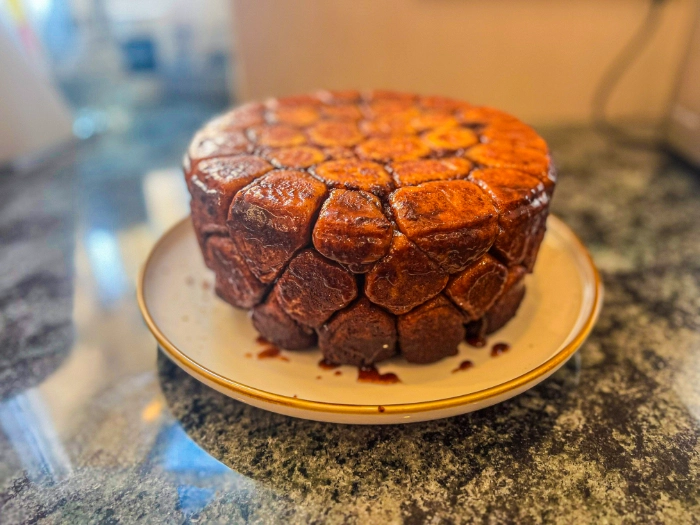
Look at this beauty!
This is what we are working for!
The flavor of sourdough monkey bread is very close to that of cinnamon rolls - butter, sugar, and warm cinnamon are front and center.
The difference lies in the shape: the small dough pieces create more caramelized edges, yielding a deeper, richer caramel flavor.
It’s less polished and more rustic than a cinnamon roll, with sticky pockets of caramel instead of a neat swirl - familiar, but bolder and more comforting.
If you want to compare the two, check out our cinnamon roll recipe: Sourdough Cinnamon Rolls: Soft, Sweet, and Naturally Fermented.
Why Use Active Sourdough Starter?
For sweet, enriched doughs where softness and structure matter, active sourdough starter is essential.
It provides a reliable rise
Supports a light, fluffy crumb
Adds depth without overpowering acidity
Discard is not ideal here. It weakens structure and flattens flavor - great for pancakes, not for a dessert like this.
If you’re unsure whether your starter is ready, this guide helps:
How to Feed Your Sourdough Starter for Perfect Baking Results.
Ingredients (Metric + US)
Dough
400 g all-purpose flour (about 3¼ cups)
100 g bread flour (¾ cup)
150 g active sourdough starter (⅔ cup)
250 ml lukewarm milk (1 cup)
1 large egg
80 g powdered sugar (⅔ cup)
80 g melted butter (⅓ cup)
A pinch of salt
Butter for greasing the pan
Cinnamon Sugar Coating
1 cup brown sugar (white or powdered sugar also works)
2 tsp ground cinnamon
(adjust to taste; cocoa powder and a variation of cracked nuts can be added as an optional extra)
Butter for Dipping
1 cup melted butter

Trust the process, it's going to be great!
Equipment
Bundt pan (recommended) — one large or two smaller
Mixing bowl
Small bowl for melted butter
Kitchen scale (always a good help)
Rolling pin
Dough cutter
How to Make Sourdough Monkey Bread
Prepare the Starter
Use a recently fed, active starter, ideally before peak activity.
Since this is a sweet dough, we want flavor without pronounced sourness.
Mix and Knead
Combine the starter with lukewarm milk, then add:
sugar
egg
flours
salt
Begin kneading. Toward the end, add the melted butter in 2–3 additions, kneading until the dough becomes smooth and elastic.
Bulk Fermentation and Folds
Let the dough rest, then perform:
folds every 50 minutes
for a total of 3 folds
If you are unfamiliar with the folding techniques, check out our guide: Folding Dough: Why It Matters and How to Do It Right.
After the final fold, allow the dough to rest for 30 minutes.
Shape the Dough Balls
Turn the dough out onto the counter, gently stretch it into a rectangle (easier to use a rolling pin, ensuring you don't crush the bubbles in the process), and cut into approximately 2×2 cm pieces (about 60–65 total).

Careful! We need all the bubbles in the dough!
Be gentle.
Roll each piece into a loose ball. Carefully, not to crush the bubbles!

A gentle shaping between two palms.
Coat and Layer
Dip each ball into melted butter
Roll in cinnamon sugar
Place loosely into a well-buttered bundt pan

This is a time to exercise a bit more patience, but everything is coming together!
Do not press them down!
If extra butter or sugar remains:
mix them together
drizzle over the top or into the gaps

Look at these beauties! Now we rest... so do they.
Final Proof
Cover the pan (a large plastic bag works well) and let it proof at room temperature for about 3 hours.
It’s ready when:
The dough has visibly expanded
The balls look like they’re about to rise out of the pan
Avoid cool environments - butter-rich dough and sourdough both struggle in low temperatures.

Look at those cracks. They say, "We are ready!"
Optional Cold Rest (If You Need Flexibility)
If baking the same day isn’t possible:
Let the dough almost fully proof at room temperature
Then place it in the refrigerator
Remove about 1 hour before baking to allow the dough to temper
This works well, but avoid baking directly from the fridge.

We had quite a bit of leftover butter and cinnamon sugar... Or maybe I made some more for the extra caramel?!
Baking Instructions
Oven temperature: 180 °C / 355 °F
Baking time:
Bundt pan: 40–45 minutes
Cake pan: up to 1 hour 10 minutes

Thank God I placed aluminum foil under the pan... This could have been so messy...
But look at them! They want to jump right out of the pan!
Bundt Pan vs Cake Pan (Tested)
Why a Bundt Pan Is Ideal
Even heat distribution
Faster, more reliable bake
Better caramelization
Less risk of drying out
Using a Cake Pan (Works, but More Complex)
When tested in a small cake pan:
The dough formed a very thick layer (up to 3 dough balls high)
Heat reached the center much more slowly
The top dried out faster
To manage this:
The oven was steamed throughout baking
The top was covered with foil around halfway through
Total bake time increased significantly
Best practice if using a cake pan:
Limit the dough to 2 layers of balls
Expect a longer baking time
Monitor moisture closely
It works - but it requires more attention than a bundt pan.

I just want to eat it... Now!
Pro Baking Tips (Important)
Steam the Oven
Just like with sourdough bread, steam helps:
slow sugar caramelization
prevent burning
promote even baking
reduce drying
This is especially useful for:
cake pan baking
long bake times
high-sugar doughs
Foil Timing Matters
Add foil around halfway through baking
Too early: it may stick to the sugar
Too late: the surface may dry out
Protect Your Oven!
Butter and caramelized sugar can leak from the pan, especially:
with cake pans
around loose seams
Place a baking sheet or aluminium foil on the bottom of the oven to catch drips.
This is yet another advantage of using a bundt pan.
Serving and Storage
Best enjoyed fresh and warm
Keeps at room temperature for 1–2 days
Reheats beautifully
You Might Also Like These Posts
How to Make a Sourdough Starter from Scratch
How to Feed Your Sourdough Starter for Perfect Baking Results
Why Isn’t My Sourdough Rising
Sourdough Pull-Apart Garlic Bread
Sourdough Cinnamon Rolls
-
What Is Monkey Bread?
-
Why Use Active Sourdough Starter?
-
Ingredients (Metric + US)
- Dough
- Cinnamon Sugar Coating
- Butter for Dipping
-
Equipment
-
How to Make Sourdough Monkey Bread
- Prepare the Starter
- Mix and Knead
- Bulk Fermentation and Folds
- Shape the Dough Balls
- Coat and Layer
- Final Proof
-
Optional Cold Rest (If You Need Flexibility)
-
Baking Instructions
-
Bundt Pan vs Cake Pan (Tested)
- Why a Bundt Pan Is Ideal
- Using a Cake Pan (Works, but More Complex)
-
Pro Baking Tips (Important)
- Steam the Oven
- Foil Timing Matters
- Protect Your Oven!
-
Serving and Storage
-
You Might Also Like These Posts