How to Make a Sourdough Starter from Scratch: A Foolproof Guide
-
What is a Sourdough Starter?
-
How to Make Sourdough Starter (Day-by-Day Guide)
- What You'll Need:
- Day 1: Mix the Ingredients
- Day 2: First Feeding
- Day 3-4: Continue Feeding
- Day 5-7: Strengthening the Starter
- The First Month
-
How to Maintain and Feed a Sourdough Starter
-
How to Use Sourdough Starter
-
Health Benefits of Sourdough: Why Sourdough is Good for Digestion and Gut Health
-
Common Sourdough Starter Issues & Fixes
-
Final Thoughts
-
You might also like these:
Sourdough baking starts with one essential ingredient: a strong, active sourdough starter. If you've ever wondered how to make sourdough starter for bread, you're in the right place! This guide will walk you through the process of creating and maintaining a sourdough bread starter so you can bake delicious, tangy loaves at home.
What is a Sourdough Starter?
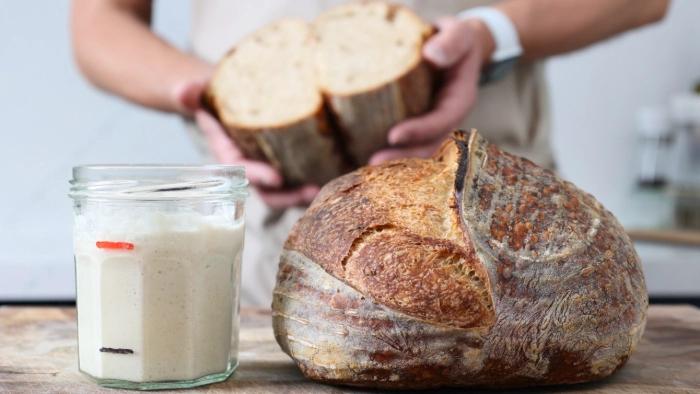
A sourdough starter is a natural leavening agent made from flour, water, and love! Over time, wild yeast and bacteria from the environment ferment the mixture, producing the bubbles and tangy flavors characteristic of sourdough bread. Unlike commercial yeast, a sourdough bread starter is self-sustaining and can be used indefinitely with proper care.
My "mother sourdough" - the base I continuously feed and use for baking - is already 8 years old! Some bakeries have starters over 100 years old. Maintaining it is simple, but consistency is key!
How to Make Sourdough Starter (Day-by-Day Guide)
Creating a sourdough starter from scratch takes about five to 7 days. Strengthening takes about a month, but once it's ready, it can last a lifetime!
Here's a simple step-by-step guide inspired by traditional methods:
What You'll Need:
A clean glass jar – to store your starter.
A wooden spoon (or similar utensil) – for mixing.
High-quality bread flour, preferably organic – the fewer chemicals used on the wheat, the better, as they can hinder fermentation.
Clean water – if your tap water is chlorinated, use mineral water or boil it and cool it first to remove the chemicals.
Day 1: Mix the Ingredients
Combine 20g of bread flour with 20g of water in a clean glass jar.
Use filtered or dechlorinated water to avoid killing the natural yeast.
Stir well, loosely cover the jar, and let it sit at room temperature.
My experience: the handle of the wooden spoon is the best utensil to stir it. :)
Day 2: First Feeding
Remove 20g of the starter and transfer it to a new jar.
Add 20g of flour and 20g of water.
Mix well, cover loosely, and leave it on the counter.
Discard the remaining old starter.
Day 3-4: Continue Feeding
If the starter has any bubbles feed the starter twice daily (morning and evening), keeping the 1:1:1 ratio (starter, flour, water).
By day 4, bubbles should start forming nicely, indicating active fermentation.
If the starter rises and falls predictably, it's a sign that fermentation is progressing well.
Day 5-7: Strengthening the Starter
If your starter is bubbly and doubles between feedings, you can switch to a 1:2:2 ratio (10g starter, 20g water, 20g flour).
Continue feeding twice daily until it's consistently doubling within 4-6 hours.
Once mature, your starter is ready for baking!
The First Month
Your sourdough starter needs time to strengthen, so be patient - it will mature beautifully with time. If you want to boost its strength even more, I have some simple tricks to share in my next post! :)
How to Maintain and Feed a Sourdough Starter
To keep your sourdough starter alive, follow these simple steps:
Feed once a day if left at room temperature.
If storing in the fridge, feed it once a week to keep it active.
But I highly recommend keeping it on the countertop. Fermentation thrives in the right environment, and your kitchen provides the perfect conditions for a healthy sourdough starter!If your sourdough starter isn’t rising, try switching to a different flour and using room-temperature water for better fermentation.
Look for signs of spoilage - if it has mold, discard it.
How to Use Sourdough Starter
Once your starter is active, you can bake everything from classic sourdough bread to pancakes, waffles, and even pizza dough!
Try these recipes:
Sourdough bread recipe with starter – A classic crusty loaf with deep flavor.
Sourdough pancake starter recipe – Light and fluffy pancakes with a tangy twist.
Recipes using sourdough starter – Get creative with muffins, crackers, and more.
Health Benefits of Sourdough: Why Sourdough is Good for Digestion and Gut Health
Sourdough offers a variety of health benefits that make it a great addition to your diet. The fermentation process not only makes it easier to digest but also helps to break down gluten, which can be gentler on those with mild sensitivities.
Additionally, the natural fermentation process increases the bioavailability of nutrients like B vitamins, magnesium, and zinc, which are essential for overall health. The probiotics produced during fermentation can also contribute to a healthy gut microbiome, supporting digestion and boosting immunity.
Studies have shown that sourdough may even have a lower glycemic index compared to other bread types, making it a better choice for blood sugar control. For more information on the health benefits of sourdough, check out the post on ScientificAmerican: The Science of Sourdough: How Microbes Enabled a Pandemic Pastime!
If you want to know even more, check out ScienceDirect also.
Common Sourdough Starter Issues & Fixes
My sourdough starter won’t rise! – If your sourdough starter isn't rising, try using higher-quality flour and non-chlorinated water. Also, check the temperature - ideally between 21-26°C (70-78°F). Consistent feeding is essential for success.
How do I know if my sourdough starter is bad? – If it smells rotten or has visible mold, throw it away.
Reviving sourdough starter from fridge – Remove from the fridge, discard half, and feed as usual for 2-3 days before baking.
Final Thoughts
Making and maintaining a sourdough starter may seem intimidating, but with patience, you’ll have a living, bubbling culture ready to bake amazing bread and pastry! If you're new to sourdough, follow this guide and experiment with different flour types like rye or whole wheat for unique flavors.
It is a hobby for life! Happy baking! :)
You might also like these:
The Science Behind the Maillard Reaction: Unlocking the Secret of Browning and Flavor
Easy Lemon Tiramisu Recipe: A Refreshing Twist on a Classic
How to Make Homemade Ladyfingers (Savoiardi)
The Ultimate Guide to Lemon Curd: Tangy, Sweet, and Irresistible
-
What is a Sourdough Starter?
-
How to Make Sourdough Starter (Day-by-Day Guide)
- What You'll Need:
- Day 1: Mix the Ingredients
- Day 2: First Feeding
- Day 3-4: Continue Feeding
- Day 5-7: Strengthening the Starter
- The First Month
-
How to Maintain and Feed a Sourdough Starter
-
How to Use Sourdough Starter
-
Health Benefits of Sourdough: Why Sourdough is Good for Digestion and Gut Health
-
Common Sourdough Starter Issues & Fixes
-
Final Thoughts
-
You might also like these: